

Table of Contents
Key Takeaway
- 🧪 A WordPress staging site is a full clone of your site. Hostinger copies your files and database to a private subdomain, so every risky change happens away from live visitors.
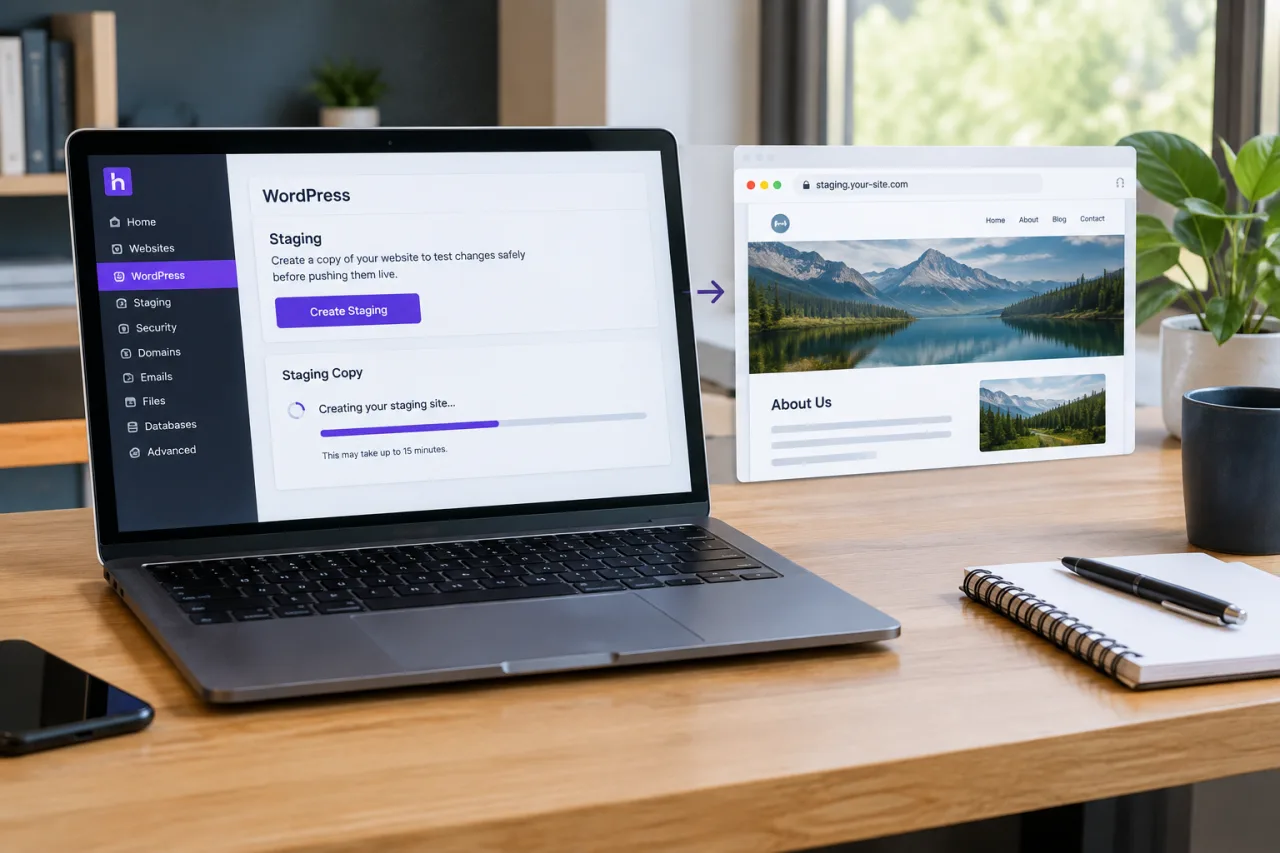
- 🖥️ The tool lives in hPanel. Open your site’s dashboard, choose WordPress, then Staging, click Create, and wait up to 15 minutes for the copy.
- 🚦 Publishing is one decision. When tests pass, Publish replaces the live files and database, and Revert or a fresh backup covers mistakes.
- 💳 The feature rides on the plan tier. Business-class plans and above include it; entry plans use a plugin or a manual subdomain instead.
- 🔁 It works on root domains only. Sites installed on a subdomain need the manual route, and WordPress multisite is not supported.
Plugin updates, theme swaps, and new checkout settings all feel safe until the moment one of them takes the whole site down on a Sunday night. That is the moment for a WordPress staging site: a private clone where a broken update stays between you and the clone instead of reaching your visitors. Hostinger ships this as a built-in hPanel tool, and this guide sets one up, works through the tests that matter, and pushes to live with your live site’s safety net intact.
The advice applies to bloggers, freelancers, and store owners alike, and it pairs with our 3-2-1 backup setup guide, because staging and backups answer different questions. Staging stops a bad change from reaching visitors; backups let you recover when something gets through anyway. The two together are the whole safety picture, and neither replaces the other.
What a WordPress Staging Site Actually Is
A staging environment is a complete copy of your production website: the same files, the same database, the same settings, running at a separate address. Hostinger’s documentation, the official staging support guide, describes it as a copy of your website used for testing purposes, created and managed directly from hPanel.
Two properties make it useful. First, production and staging are not connected, so what you do on the clone cannot disturb the live site. Second, the copy is real: themes, plugins, posts, and orders travel together, which means a test on staging reflects what the change will do to your actual site, not to a fresh demo install. Hostinger’s product documentation at docs.hostinger.com adds the practical limits: creating one can take up to 15 minutes, and multisite networks are not supported.
A WordPress staging site earns its keep at predictable moments. Before a plugin update round, before a theme change, before you hand a client a proposal for a redesign, and before you touch the checkout of a running store. A WordPress staging site turns each of those from a public experiment into a private rehearsal, which is why agencies treat it as standard practice rather than an optional extra. If a change can be described as wondering what happens if, it belongs in the clone first and on production only after the tests pass. That discipline is exactly what a WordPress staging site exists to enforce, and the tooling cost is minutes, not hours.
Before You Start: the Plan and the Domain
- Plan tier. The built-in staging tool is included on business-class plans and higher, and the docs note that entry-level plans see an upgrade prompt in its place. If you are still choosing a plan, this is one of the features worth pricing in; you can compare the current Hostinger hosting plans when picking.
- Domain shape. The tool creates staging for root domains. If your WordPress install lives on a subdomain, the support guide directs you to set up staging manually instead.
- External nameservers. If your domain’s DNS lives at another registrar, you will need to add an A record for the staging subdomain yourself, pointing to your Hostinger account’s IP address, otherwise the new address will not resolve.
Create a WordPress Staging Site on Hostinger in Four Steps
The whole flow is four clicks and one wait, straight from the official guide.
- Open hPanel and pick your site. Log in, go to Websites, and open the Dashboard for the WordPress site you want to clone.
- Open the Staging tool. In the left sidebar, choose WordPress, then Staging.
- Create the environment. Click Create staging, enter the subdomain name you want the clone to use, and confirm. A typical staging address looks like a variant of your domain on its own subdomain, following the pattern shown in the docs.
- Wait for the copy. The clone can take up to 15 minutes depending on site size. When it finishes, the environment appears in the Staging panel with a Manage staging button that opens your copy’s WordPress admin.
From here you are inside an exact copy of your site, and the public address still serves the untouched original. Your WordPress staging site is ready, and everything you are about to try happens to the clone only.
The Five Tests That Matter Before You Push
A staging copy exists so that you can break it on purpose. Work through these in order, because the first three catch most of the damage that updates cause.
- Run the pending updates. Plugins first, then themes, then WordPress core; the order and cautions come straight from the WordPress.org update documentation. After each round, walk your site’s main pages and check for visible errors, then check your error log.
- Test the plugins you just installed. A conflict shows up when two plugins fight. On a store, run a full test order from cart to confirmation; our WooCommerce setup guide covers the store-side details this test protects.
- Try the theme or template change. New theme, then key pages: homepage, a post, an archive, your contact form.
- Check the forms and the mail. Submit your contact form on staging and confirm mail still routes correctly, because email settings can break during updates.
- Look at speed once. If the site feels slower after your changes, that is a finding. A slow update is a problem you can fix before visitors meet it.
Staging for Stores and Client Sites
Selling on your site sharpens the stakes. An ordinary blog can show an error for an hour without lasting damage; a store that misprices a product or drops its checkout button loses real orders in real time. This is the lane where a WordPress staging site stops being optional: commerce changes touch customer money, and rehearsals are how commerce sites stay trustworthy.
- Stores: update the store’s extensions on staging, place a full test order, and check the order emails and shipping choices before anything ships to live. The clone carries your product catalog, so the rehearsal is faithful.
- Client work: a WordPress staging site is how you hand a client a proposal the client can actually see. Build the redesign on the clone, send the subdomain address, and gather feedback where wrong guesses cost nothing.
- Content teams: big layout changes and new templates preview on staging, so editors approve what they will actually get, instead of imagining it from a screenshot.
Push to Live Without Regret
When every test passes on your WordPress staging site, the push is a single decision, and the safety rules around it are two. Both exist for the same reason: publish overwrites production, by design, and the only bad surprise should be none.
- Back up production first. Take a fresh backup of the live site before any publish. Hostinger hosts backups under hPanel’s backup section, and the docs are explicit that pushing overwrites your live files and database, so a rollback point is part of the process, not a nice extra.
- Choose the publish path your panel shows. In the Staging panel, the options menu beside your environment offers Publish, which after confirmation replaces the live files and database with the staging versions. The newer documentation describes the same action as Push to live or Sync to production, with a choice of scope: files only, database only, or a full sync of both. The scope choice matters when you only want to ship code, for example, without overwriting newer live content.
- Know your undo. After publishing, the same menu offers Revert changes, and if anything is off, the backup you took seconds earlier is the full restore. Staging itself survives a failed push, so you can fix and try again.
- Refresh your clone between rounds. When the live site keeps moving while you test, use the pull-from-live action to overwrite staging with a fresh copy of production, so your next test round runs against current data.
- Delete when done. Stale clones waste disk and drift out of date. When a test cycle ends, delete the environment from the same menu; production is unaffected.
No Staging Button on Your Plan? the Plugin Route
If your plan tier does not include the built-in tool, the WordPress route is the WP Staging plugin, which Hostinger’s own tutorial recommends for exactly this situation.
- The free plugin clones the site. Install and activate it, open WP Staging from the dashboard, choose Create Staging Site, name the copy, and let it duplicate your files and database. The clone is reachable like a subfolder of your site.
- Cloning is free; shipping is the paid tier. Pushing changes from the clone back to live is a premium feature of the plugin, priced as a subscription on the vendor’s page. If your workflow is mostly one-way (test away from live, then apply changes by hand), the free tier still covers the isolation part.
- The manual subdomain method exists. For maximum control, create a subdomain in hPanel, copy your site files into it, create a fresh database, and point the clone’s wp-config.php at that new database while setting its home and site address. It works, and it is exactly as technical as it sounds; the built-in tool exists so most people never need it.
Mistakes That Cost People Sites
The tool removes most failure modes, and habit creates the rest.
- Testing on live out of habit. Small tweaks seem too minor for a rehearsal, until the small tweak is the one that whitescreens the homepage. Route every change through the WordPress staging site and the habit protects the boring days too.
- Skipping the pre-publish backup. Publish overwrites production; that is the design. The backup is your version history. Without it, Revert covers less than you might assume.
- Testing against old data. A clone from last month validates last month’s site. Pull from live at the start of each cycle, so the WordPress staging site you test against matches reality.
- Leaving clones forever. An abandoned clone sits on your disk with an old copy of your database in it. Delete environments when a cycle ends.
Habits That Keep Releases Boring
Staging pays off as a routine, not a rescue. The WordPress staging site you keep alive between cycles becomes the place where experiments happen by default, and your production site becomes the place where only tested changes arrive. Three habits keep that division working.
- Pull before you build. Start every test cycle from a fresh pull of live data, so you are testing against the site that exists today, not last week’s copy.
- One environment, one job. Keep a single, named staging environment for experiments and delete it after the push, instead of accumulating forgotten clones with stale data.
- Log what you tested. The checklist above works best written down: what you updated, what you clicked, what passed. When something breaks in production later, your notes say exactly which change deserves the suspicion. For your first site build, our portfolio website guide walks the hosting setup that feeds this workflow.
A WordPress staging site costs you minutes and saves you the worst kind of evening. Create it from hPanel, test the way visitors actually use your site, back up before you push, and your updates stop being a gamble. Combine it with the 3-2-1 backup rule and your live site keeps both a rehearsal room and an escape hatch.
FAQ
Does the Hostinger staging tool cost extra?
No separate fee: the tool is included with business-class hosting plans and higher, as part of the plan, so treat it as one of the features the tier you picked already covers rather than a separate line item. The clone does use your plan’s disk space, which is one more reason to delete environments you finish with. Entry-level plans do not include the tool and see an upgrade prompt in its place.
How long does it take to create a staging environment?
Up to 15 minutes, depending on the size of your production site, per Hostinger’s documentation. The environment appears in the Staging panel when the copy completes.
Can visitors see my staging site?
The clone lives on its own subdomain address that you choose, separate from your public domain, and search engines have no reason to link to it. If your site holds private material you want shielded during tests, test with that content on staging only when you also keep the address out of search by your usual means.
What is the difference between Publish and Revert?
Publish copies the staging version over your production files and database, making your tested changes live. Revert steps the live site back, and the backup you took before publishing is the deeper undo. Take the backup first, because it covers the worst case fully.
Does staging work for a site installed on a subdomain?
The built-in tool serves root domains. Hostinger’s support guide sends subdomain-hosted sites to the manual setup route, and WordPress multisite networks are not supported by the tool at all.
Should I delete my staging environment after publishing?
Yes, when a test cycle is complete. The clone keeps using plan storage and slowly drifts out of date as your live site changes. Delete it from the staging menu, and use pull-from-live to refresh staging at the start of your next cycle instead of keeping old copies around.
- hostinger.com/support/5720286-how-to-create-a-wordpress-staging-envir… — official staging support guide
- docs.hostinger.com/wordpress/staging
- hostinger.com?REFERRALCODE=1EAGRONFILE47 — Hostinger hosting plans
- wordpress.org/documentation/article/update-wordpress
- wordpress.org/plugins/wp-staging — WP Staging plugin
External sources linked in this article, in order of first mention. Spotted an error or a broken link? Tell us.
Cite this pagePublished Nov 15, 2026
Agron, E. (2026, November 15). How to Set Up a WordPress Staging Site on Hostinger. WorldNgayon. https://worldngayon.com/wordpress-staging-site-hostinger/
Agron, Edmon. “How to Set Up a WordPress Staging Site on Hostinger.” WorldNgayon, 15 Nov. 2026, worldngayon.com/wordpress-staging-site-hostinger/.
Agron, Edmon. “How to Set Up a WordPress Staging Site on Hostinger.” WorldNgayon, November 15, 2026. https://worldngayon.com/wordpress-staging-site-hostinger/.
Agron, E. (2026) ‘How to Set Up a WordPress Staging Site on Hostinger’, WorldNgayon, 15 November. Available at: https://worldngayon.com/wordpress-staging-site-hostinger/.
E. Agron, “How to Set Up a WordPress Staging Site on Hostinger,” WorldNgayon, Nov. 15, 2026. [Online]. Available: https://worldngayon.com/wordpress-staging-site-hostinger/
@online{agron2026wordpressstaging,
  author       = {Agron, Edmon},
  title        = {{How to Set Up a WordPress Staging Site on Hostinger}},
  year         = {2026},
  date         = {2026-11-15},
  organization = {WorldNgayon},
  url          = {https://worldngayon.com/wordpress-staging-site-hostinger/},
  urldate      = {}
}TY - ELEC AU - Agron, Edmon TI - How to Set Up a WordPress Staging Site on Hostinger T2 - WorldNgayon PY - 2026 DA - 2026/11/15/ UR - https://worldngayon.com/wordpress-staging-site-hostinger/ Y2 - ER -
Cite the version you read; the page may be updated. Zotero and Mendeley can also import this page directly.